3d Canvas Samples
1 sncf X3800 autorail “Picasso”
This was a new model built especially to try out the technique, and includes lots of beginner’s errors…
Sample files — sncf X3800 in 3DC and Rail3D format: X3800.zip (380kB)
2 Rh B Ge4/4iii loco
I completely rebuilt my earlier (“strips and fills”) model using 3DCanvas.
RhB_641_rebuilt.zip (500kB)
3 Rh B Centre-entrance coach “Fliegender Rhätier”
4 ns 2400-series diesel loco
The simple bitmap texture isn’t really good enough — a tga with alpha transparency would look better. One “clever” thing I tried with this model was separating out the number panels into separate comonents in the exported model, and replacing these (by hand) with Fill panels using the Number dynamic texture. Because the panel coordinates are taken from the original model, they match up seamlessly.
5 Kruckenberg “Schienenzeppelin”
Franz Kruckenberg’s “Rail Zeppelin”, familiar to many as a Märklin model, was one of a number of German experiments in high-speed rail transport in the 1920s and 30s. The idea was to use a streamlined body of lightweight space-frame construction (as used in the airship industry) powered by a powerful bmw aviation engine driving a rear-facing airscrew. The experimental railcar reached a record speed of 230.2 km/h on the 21 June 1931. For many reasons, most of them pretty obvious, the idea never got beyond a protoype. See http://de.wikipedia.org/wiki/Schienenzeppelin for more details.
This project, with all sorts of complicated curves, lends itself very well to the use of a 3D modelling tool. It isn’t possible to animate the airscrew at the moment, which is a pity. Another aspect that might need a bit more work is getting the “shiny aluminium” look right — the present texture looks a bit too white.
Rail Zeppelin and simple test layout: zeppelin_test.trp (1.8MB, 25/05/06)
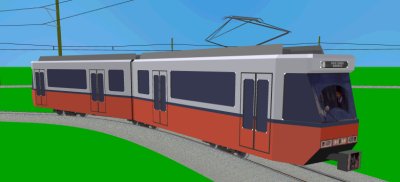
6 nmvb (“De Lijn”) 6000-Series tram
This is a first test of the Import plugin. I simply took all the components off the old model and imported them into 3DCanvas.
Existing Fill-based model with a couple of small textures
Since the model only uses three main colours, plus various greys for windows and underframe components, I made a coomposite texture with the existing small detail textures and a few blocks of colour.

Texture, actual size (256×256)
I used the “select same material” function in 3DCanvas to select panels of the same colour in the model (usually there are one or two that weren’t quite the same colour and have to be added to the selection by hand, e.g. the downward-facing panel around the coupler shaft).
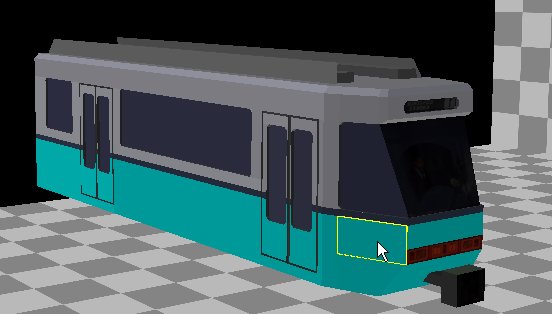
All orange panels selected
I then textured these panels with a block of the right colour. After repeating for the other colours, and retexturing the windscreen, coupler, lights and destination blind, I had a model that was completely textured with one small texture. The same process applied to bogies, wheels, etc.
I optimised the model a bit, e.g. by welding coincident points, but I didn’t try to “improve” anything for this test.
The only parts that I modelled “new” were the articulation (two sectors of a cylinder, using strips in the old model) and the pantograph (reworked with the New Pan Code using parts created in 3DCanvas).

New model exported back to
Rail3D[Note that the pantograph is down in this screenshot, due to a bug with pantos on subunits at the time I built the model]
Attach:NMVB_6000_new.zip|Download the model
loneaussie 11/02/2015 23:21:02