Using Detailed Maps And Images
Whilst the Digitising A Railway is a powerful tool for laying trackwork according to maps or aerial imagery, it can be very hard to properly align a detailed map covering a small area properly to your layout for a number of reasons, including an inability to rotate the image and inaccuracies when plotting the datum points with the mouse. It can also sometimes be difficult to see if items such as points, signals, etc. are in exactly the right place. However, by using a large scenery item, it is very easy to lay track directly onto the image.
1 Limits
old-maps.co.uk, with full-screen button circled.Rail3D and your computer obviously cannot handle images and scenery items of infinite size. The largest I have managed to use without a crash is a scenery item 410×1045 metres in size, using an image 1300×3300 pixels. If you need to cover an area larger than this, multiple images/scenery items should be used.
2 Theory
By laying track directly onto the image, and being able to see the detail in R3D compared to the detail on the image, it is very easy to lay accurate curves, make nice yard ladders, and get exact spacings/locations correct.
3 Finding and preparing your image
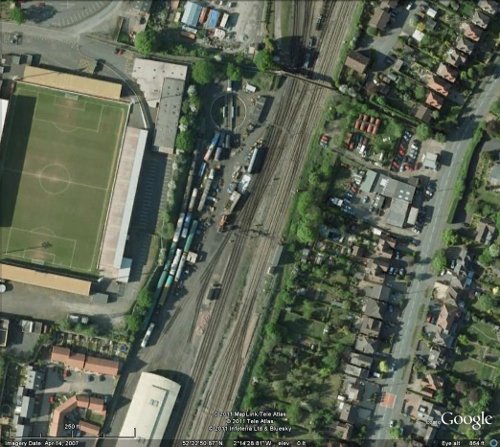
Example Google Earth imageThere are two ways to go when finding your image - a detail map or an aerial photo. One important requirement is to have a scale for the image - this will be used to get the correct dimensions on the scenery item. Sources can include scanned maps, mapping websites, and aerial image providers.
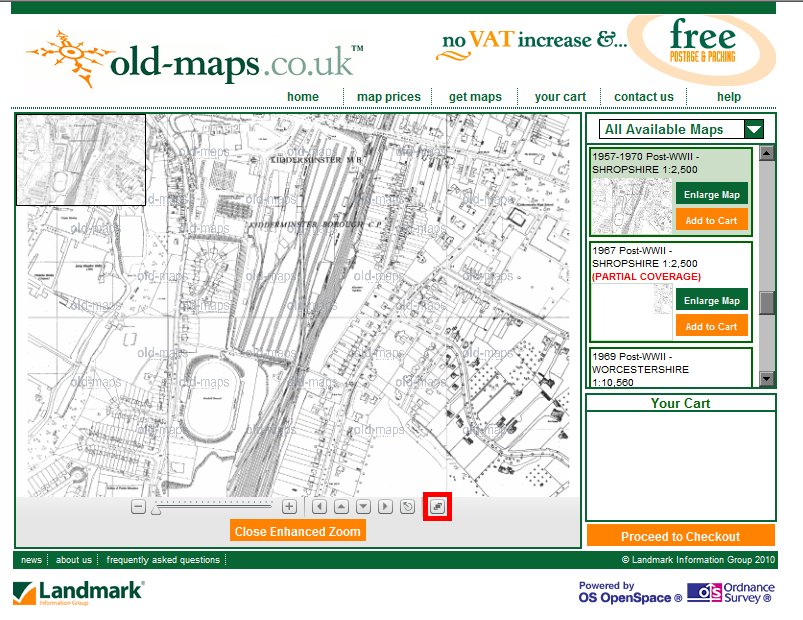
For older layouts based in the uk, a large selection of 1:2500 and 1:10000 os maps are available from www.old-maps.co.ukUsing Detailed Maps And Images from various dates - a screenshot using the fullscreen mode (available under Enhanced Zoom > rightmost button on the toolbar) works.
For aerial images, possible sources include Google Earth - the hotkey to save the current display is Ctrl-Alt-S. Google Earth handily has a scale display, and this is saved along with your image.
4 Making your scenery item
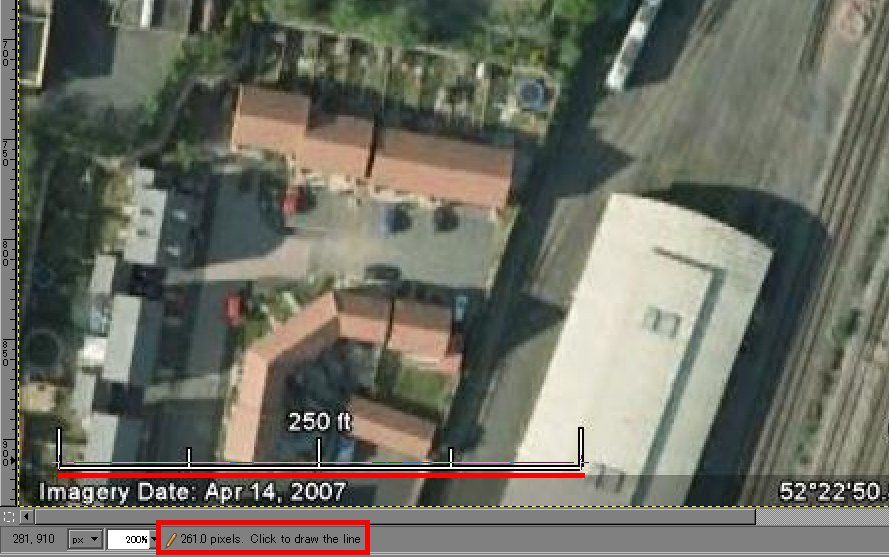
Measuring the scale barFirstly, we must work out the dimensions of our image. os Maps have grids marked on them - for a 1:2500, the distance from one grid line to the next is 100m - whereas in the case of Google Earth, the scale serves a similar purpose. Using a suitable image editing program, measure the length of a known length in pixels (many programs give a readout when drawing straight lines - even Microsoft Paint!). To get the dimensions of the image, divide the Scale Length by the Measured Length in pixels, and multiply by the image size in pixels. For example:
- I measure a 250ft scale as 261 pixels
- This comes out as 0.958ft/pixel, or 0.292 m/pixel
- My image is 1044×934
- Multiplying by 0.292 m/pixel, this comes out as 305×273m.
We then need to create a new scenery item in the R3D editor - no need to worry if you aren’t experienced in modelling, this is about as simple as scenery items go! One “fill” is required, with the dimensions being -x/2, -y/2 to x/2, y/2 (to centre it on the scenery marker). It also helps to put the image slightly below 0 height, so that the railtops show when we come to laying track later.
Name Kidderminster Aerial Image
METRIC

//Centred on 0/0/-10
Fill -15250/-13650/-10 15250/-13650/-10 15250/13650/-10 -15250/13650/-10 0.0.0 "GoogleImage.bmp"
5 Using it in R3D
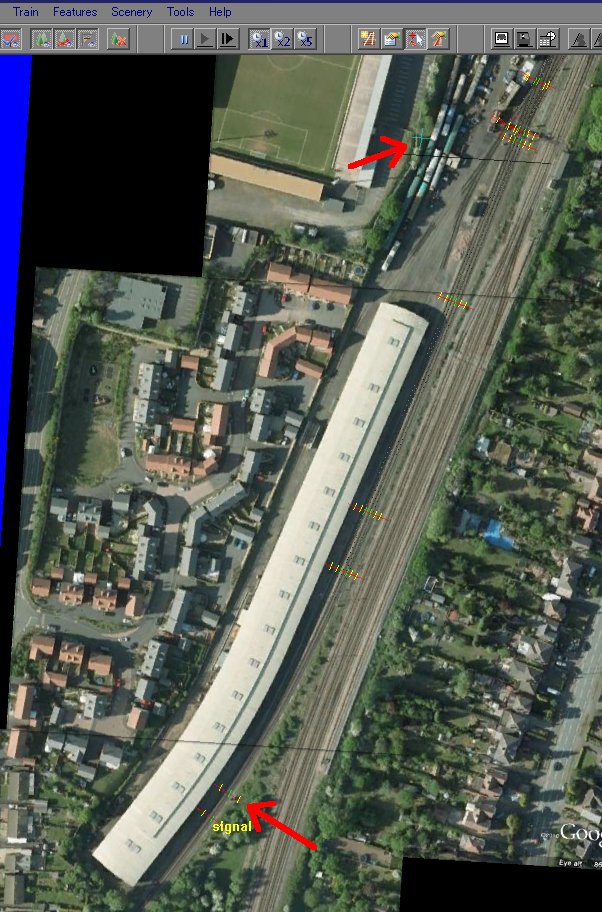
The finished product.You can now place the scenery item in Rail3D. This works best if you already have some track laid down, and have some track and a point/curve/platform/etc. to align the scenery item to. It is also helpful to place the image on a node at the same height as your trackwork - you can delete the node and move the scenery item freely once it is placed, however, as the scenery item will remember its height.
Orientate the scenery item if it is not quite right (I find that even though my digitiser images and aerial images are both facing north, they are a few degrees out usually). Also move the image around until it is aligned with your trackwork if needed - finding an obvious place visible both on the image and in your R3D trackwork is useful.
You can then lay onto the image at your heart’s content!
On the picture to right top arrow indicates the scenery marker, showing how big the scenery item is, whilst the bottom arrow shows a signal post/lineside cabinet I used to align the image and the trackwork. Nodes can clearly be seen, and you can just make out the rail tops.
import