Terrain and Landscape

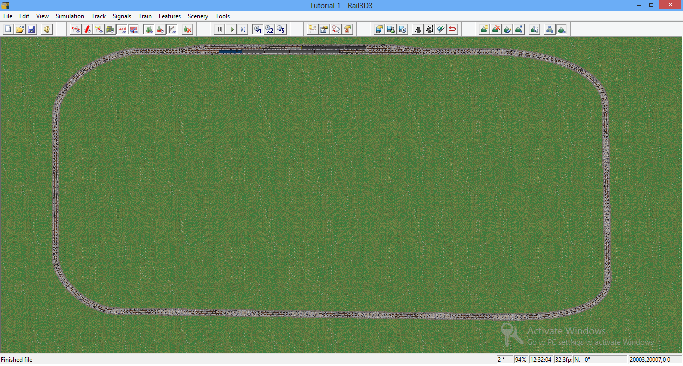
So far in the tutorials we have created a loop of track with two trains and signals. (If you need to you can download the layout here ). However so far, our layout is just flat and has no landscape: in this tutorial we will add a small hill and build a tunnel.
How Rail3D models terrain
In Rail3D, terrain (or landscape) is modelled by a series of terrain points: terrain points specify position (x and y) and elevation (height). Rail3D then builds a terrain surface from this points.
We will start by building a simple hill in the centre of our layout:
- Open Rail3d and load the tutorial layout. (If you need to you can download the layout here).
- Pause the layout (if it is running)
- Select view mode 5 (plan view) and zoom out ([-] key or mouse wheel) until you can see most of the layout
- Turn on "Terrain Points" by clicking the toolbar:

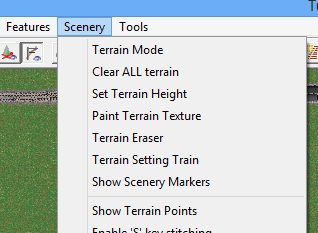
or by selecting "Show Terrain Points" on the "Scenery" menu:
- Select "Terrain mode" from the "Scenery" menu, or click the "Add terrain points" button on the toolbar:

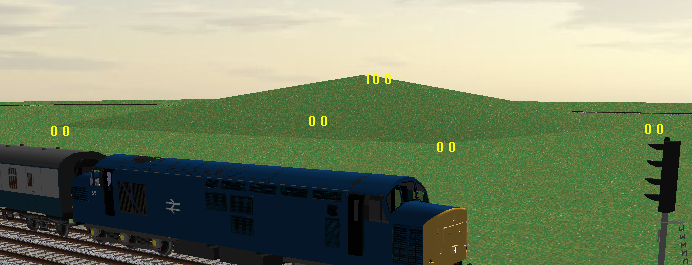
- In terrain mode when you click on the layout, you create a terrain point. Click in the centre of the layout to create the first terrain point.
When you click to create a terrain point, a dialog pops up for you to enter the elevation of this terrain point: enter 10 for a 10 metre hight point. When you click "OK" in the elevation dialog, yo should see the new point marked on the layout.
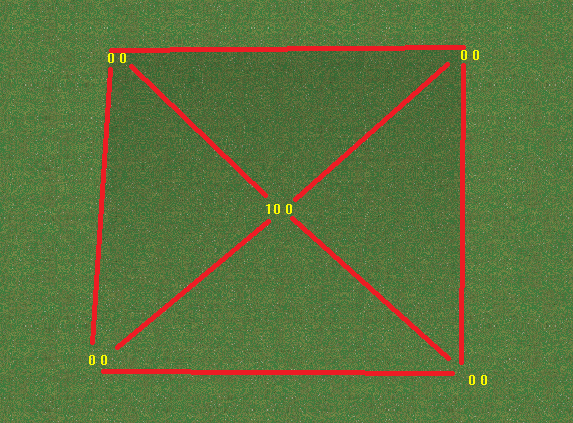
- Enter four more points at elevation 0 to make the following pattern:
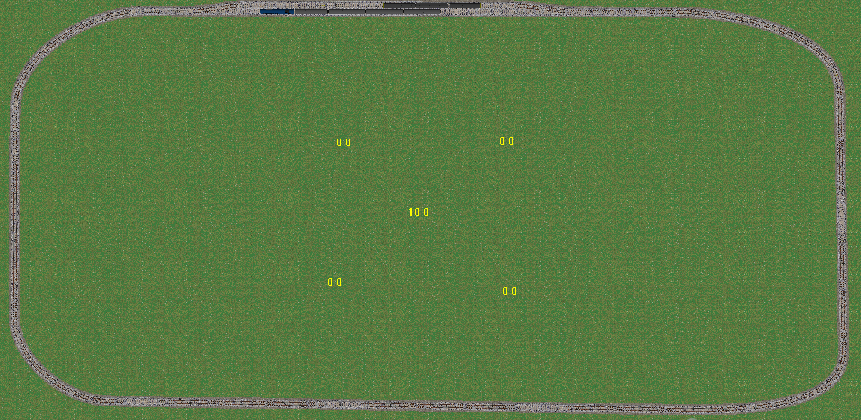
note that if you are entering a lot of points at the same height, you can click the "Height" button:

to set the height - this avoids having to enter the same elevation each time you create a point.
Triangulating the terrain
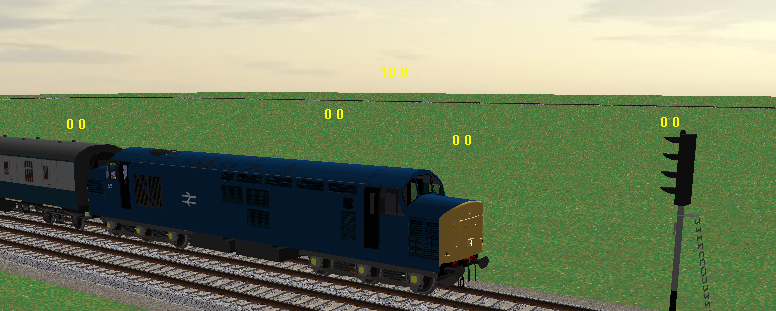
If you look around the layout (eg go back to view mode 2 and look around) you will see that although the terrain points exist, the actual terrain is not there yet.
To show the terrain, Rail3D has to generate the terrain surface, this can be a long process (especially on a large layout) so is not performed automatically, but only when you instruct for it to happen.
- To generate the terrain, click the "Generate Terrain" button

or select "Generate Terrain" from the "Scenery" menu.
- Rail3D runs the terrain generation process. When this completes, you should now see the hill:
Rail3D create the terrain surface by forming a series of triangles between the points (this is why terrain generation is often referred to as "triangulation"). In our simple example, the triangles (in plan view) will be something like this:
Cuttings and tunnels
We're now going to extend our hill so that it covers part of the track, and see how Rail3D handles cuttings.
- Add more terrain points so that they extend beyond the track:
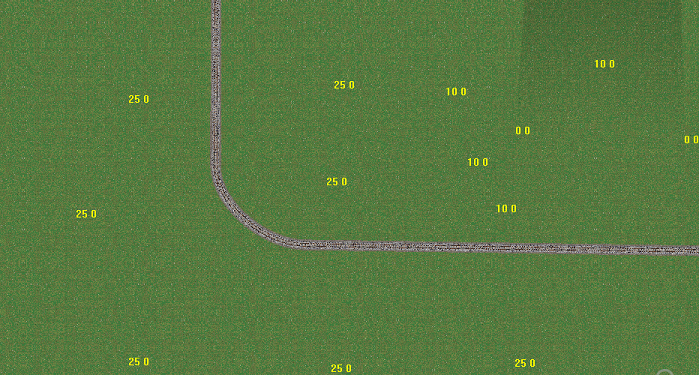
- and click the "Generate Terrain" button to triangulate the terrain points: Rail3D generates a new terrain surface using the new points.
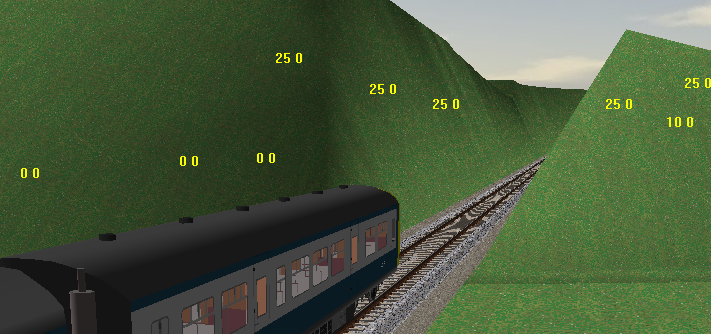
AutoCuttings
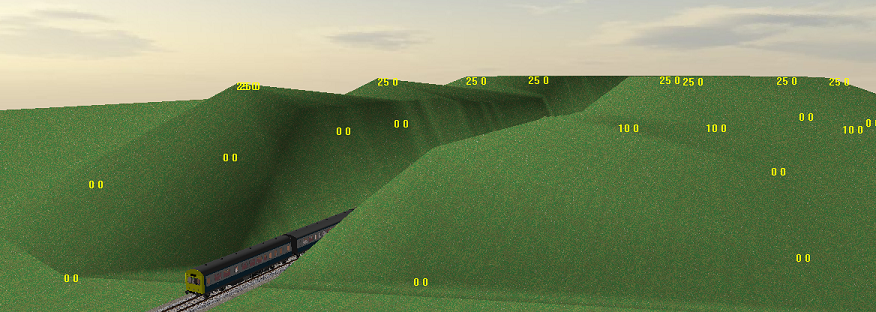
By default, Rail3D automatically creates cutting and embankments to fit the track where it meets terrain. (This is called "AutoCutting"):
- To make a tunnel, we need to turn off the cutting parameter for the track:
- Double click the track link: the track dialog opens:
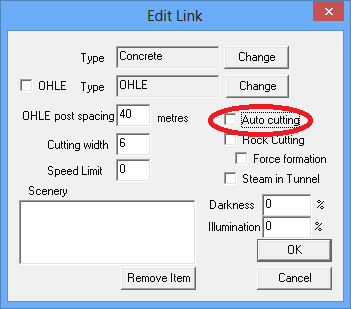
If you get the "Edit Node" dialog instead of the "Edit Link" dialog, you have clicked a node not a link: try again on the track link.
Untick "AutoCutting" on the dialog and click "OK"
- Run the terrain triangulation again:
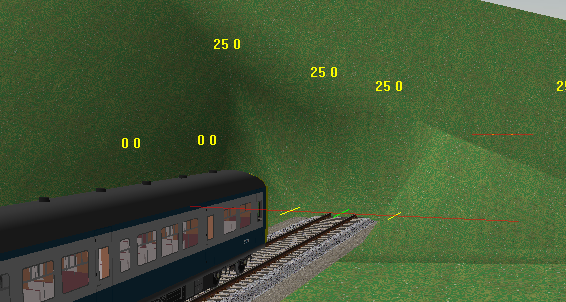
- The section where we turned off "AutoCutting" no longer creates at cutting in the terrain.
However, because Rail3D always creates a complete terrain surface, it has filled in the gap where we want the tunnel entrance to be. To correct this, we need to create a hole in the terrain surface.
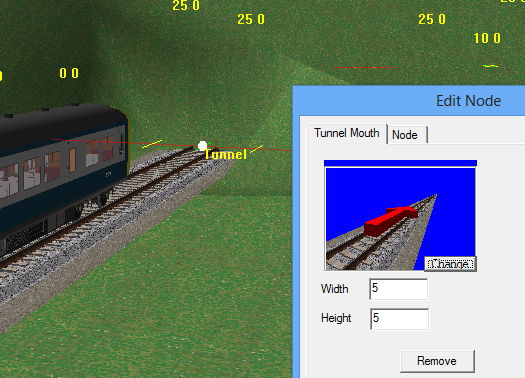
- Right click on the node between the link outside the tunnel and the link in the tunnel (the node in front of the unit in the above picture)
- Select "New Tunnel mouth" from the "Scenery" sub-menu of the pop up menu:
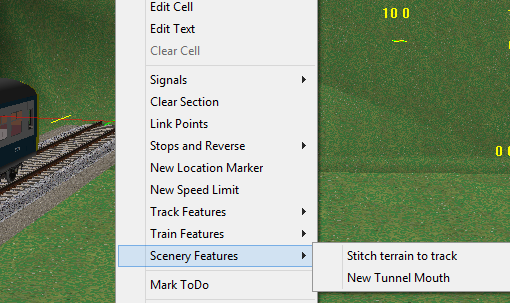
- This creates a "Tunnel mouth" feature on the node.
- Double click the node, and check that the tunnel direction is into the tunnel:
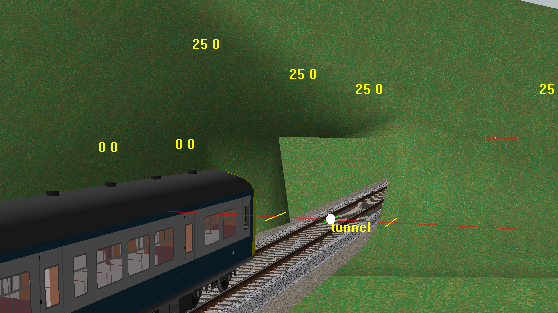
- Run terrain triangulation again. Rail3D now creates a tunnel opening in the terrain:
There's more to do:
- Set the tunnel to be dark (rather than lit as it is above)
- Add tunnel walls
- Add a tunnel mouth scenery object
- Create the other end of the tunnel
You can go ahead and extend the tunnel, and create the tunnel opening at the end using the steps on this page: we'll add the scenery in the next tutorial
Other ways to add terrain points
There are many other ways to create terrain:
in the next Tutorial, we will start adding some Scenery to the layout.
Tutorials
Scenery