Creating Track Models
see also Track Format
Track models are ASCII text files with .STT extensions.
To create a track model
Prepare a texture skin in BMP format (or use an existing skin texture)
- Open the Rail3D stock editor, and select the "Track" Tab of the navigator
- Select "New" from the "File" menu
- Enter the Name of your new track type, the TRACK2 keyword and the name of the texture skin you want to use
- You can optionally add a <SWITCH> block to the file if you wish at this point
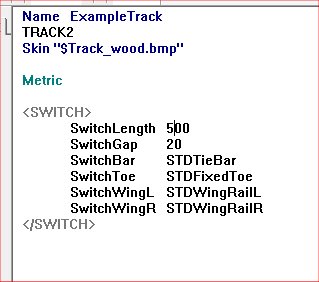
- Save the file in your Rail3D track folders, with .STT extension
- Close the editor and re-open it.
(This is necessary to get the track model to appear
in the editor selector and preview window)
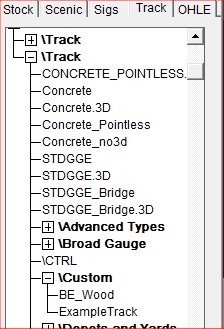
When the editor reopens, select the track tab, and your new model should appear in the navigator:
- Select the Track item and open it in the editor
- Open the preview window (it will be empty at first)
We can now start adding the elements of the track.
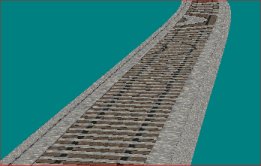
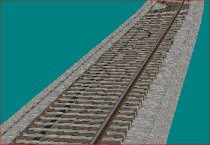
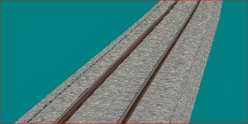
- Add an element for the ballast bed:
FILL 200/0/-35 -200/0/-35 @0,0.25
This specifies a section from 2 metres to -2 metres (across the track) and 0.35m below the rail top, it is textured with the part of the texture from 0 to 25% across
I've used the $Track_Wood.bmp texture in this example, which looks like

so the result of the above FILL in the preview window is:

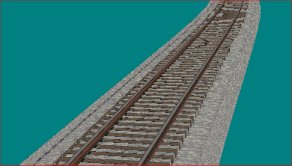
- We can add side edges to the ballast:
FILL 250/0/-50 200/0/-35 @0,0.25
FILL -200/0/-50 -250/0/-50 @0,0.25
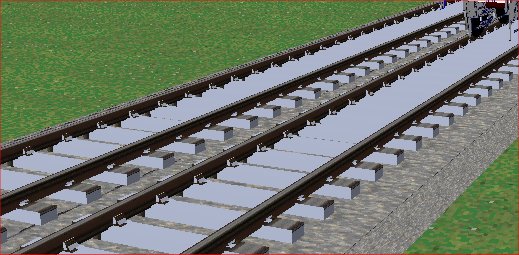
- Next we add an element for the sleeper section:
FILL 140/0/-30 -140/0/-30 @0.25,0.5
- and we can add edges to the sleepers as well:
FILL 140/0/-35 140/0/-30 @0.25,0.5
FILL -140/0/-20 -140/0/-35 @0.25,0.5

- And now we can add the rails
RAIL 90/0/0 76/0/0 @0.75,0.7
RAIL 90/0/-20 90/0/0 @0.625,0.7
RAIL 76/33/0 76/33/-20 @0.7,0.625
- And we can repeat for the other rail.
RAIL -76/0/0 -90/0/0 @0.75,0.7
RAIL -90/0/0 -90/0/-20 @0.625,0.7
RAIL -76/0/-20 -76/0/0 @0.7,0.625
Making a 3D track model
We can add a 3D track version of the track if required.
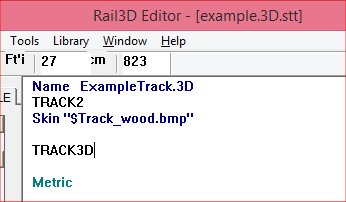
- Make the 2D track version as above and save the 2D file
- Open the 2D version and change the name by adding the .3D prefix.
- Add the TRACK3D keyword
- Save the file with a new name eg "ExampleTrack.3D.stt" (and the .STT extension)
- Reopen the original 2D file, and add the <TRACK> block:
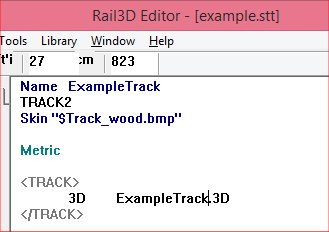
- Close the editor and reopen.
- When the editor reopens, open the new 3D model and open the preview window.
Initially, the 3D version will look the same as the 2D model we copied. We need to customise it to the 3D version.
- Select the FILLs that define the sleepers and delete them:
- Add a <TRACK> block that specifies the sleeper model and spacing required:
<TRACK>
Sleeper STDWoodSleeper
Spacing 80
</TRACK>
- Save the model.
- And try it in Rail3D
Please share your new model with the Rail3D community
Track
MRG 06/02/2015 12:36:47